
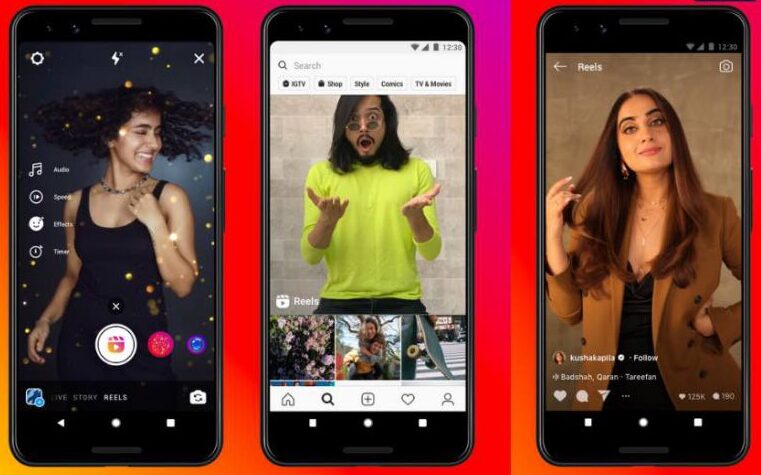
Why are Instagram Reels blurry? How to fix Instagram Reel quality bad? How to upload high-quality videos to Instagram? Read this article to find out.
Instagram is a social media application that can be used to share photos and videos on your profile. It was founded in 2010, and it was later bought by Facebook Inc. (now known as Meta) in 2012. And since then Facebook has been developing the application.
Not only for posting and viewing media content, but Instagram can also be used to message your friends on Instagram. Instagram is said to have more than 1 billion monthly active users. It is the 4th most used application, preceded by Facebook, YouTube, and WhatsApp.
Why is my Instagram Reel blurry?
Short Answer: Instagram Reels are blurry because of the data constraints you have set in the application. There is a possibility that you are not using the correct video format and settings to upload Reels.
Also, do check your internet connectivity, and your camera settings on the phone, and try to upload the video with the correct size and quality. Sometimes, the problem might be with the application itself. Glitches in the applications might also be the reason for bad-quality Reels.
How to fix Instagram Reel quality bad
Here are some methods to fix Instagram from uploading your video in a bad quality.
1. Turn off data saver mode in Instagram
There is an option on your Instagram application, to save some data. This feature is used to save data if you have some data limits, that you don’t want crossed.
- Open the Instagram application.
- Now, go to settings and select the account application.
- There you will find an option called “Cellular Data/Data Usage”.
- Then, select that option and under the “Use Less Data” title, you will find a toggle switch with “Data Saver”. On iPhones, it is named as “Use Less Cellular Data”. Turn that off.
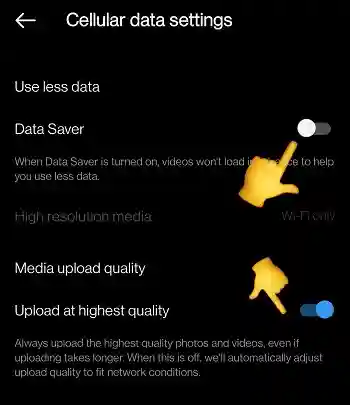
2. Turn on Instagram High Quality Uploads
The option to upload higher quality pictures can be found on the Instagram app itself. If you turn this ON, the high resolution uploads you do to Instagram will remain that way.
- Open the Instagram application.
- Go to settings and select the account application.
- There you will find an option called “Cellular Data/Data Usage”.
- Under this you will find “High Quality Uploads” option with a toggle switch. Turn that switch ON.
3. Do not record reels at 4k (just record at 1080p)
Recording your Instagram Reels at 4K resolution can result in larger file sizes and can also lead to quality issues when uploading to the platform.
It’s generally recommended to record your Reels at 1080p resolution instead, which is still a high-quality format that will look great on the platform.
4. Record at only 30 FPS (not 60 FPS)
When recording your Instagram Reels, it’s recommended to record at 30 frames per second (fps) instead of 60 fps. While recording at 60 fps can result in smoother footage, it can also lead to larger file sizes and can cause issues when uploading to the platform.
Recording at 30 fps is the maximum supported frame rate for Instagram Reels and will ensure that your videos are properly formatted for the platform.
So, go to your device’s camera setting and turn down the recording video quality to only 30 FPS instead of 60 FPS as most modern smartphone come with 60 FPS default recording settings.
5. Turn HDR on camera
High Dynamic Range is commonly abbreviated as DHR or HDR. This helps improve the quality of your video or image by capturing all the essential information. And this information is mostly brightness and color related. These are processed on a broader range than normal. So, this range gives you a quality which wasn’t possible with Standard Dynamic Range (SDR).
If your phone supports high quality recording of videos i.e. 1080p or 2K or 4K, you need to turn those settings ON from the camera.
- Open the settings on your phone camera, search for video quality and set it to the highest available option.
- And if you are an iPhone user, go to the settings of your phone. Find camera and turn ON “Automatic DHR”.
6. Upload correct format
Upload the correct format of the video to Instagram.
- Try uploading with the recommended compatible aspect ratio i.e. 1080*1920 pixels. So, the aspect ratio in full screen mode is 9:16 and 4:5 on Instagram feed.
- Also, the Reels should be of the time duration of 1 minute / 60 seconds (or less) – which is the maximum.
If you try uploading with aspect ratio greater than the recommended amount, your video will be compressed, resized and the final product will be blurry.
7. Use Instagram Camera
If your videos are getting blurry when you upload videos taken from your camera, it is time to mix things up. As you know, Instagram is basically a media sharing service. And it has its own camera to record videos and take pictures.
- Open the Instagram Application and click on your story option. There you can select Reels option and record your video.
- This video will not be blurry, because you record it from Instagram. Instagram takes care of all the specifications like aspect ratio, video quality and sound too. So, you will not have to worry about quality anymore.
8. Check your internet connectivity
Internet connectivity is must for any kind of online service. A slower network speed while uploading or while taking the video on Instagram, might cause a drop in quality. Check out your internet connection. To check your network’s speed, visit www.fast.com. Also, check that your Wi-Fi or cellular data is turned on.
If you are using Wi-Fi, ensure that the Wi-Fi symbol does not have an exclamation mark beside it, try to check your Wi-Fi connection and turn the router OFF and ON again. If that does not solve it, please contact your Internet Service Provider (ISP).
Or If you are using cellular data, make sure it is on and displaying two arrows blinking in the opposite direction, with a H+, 2G, 3G, 4G or 5G beside it.
9. Update Instagram app
As we know, newer versions of an application give you new features while also fixing any bugs. So, it is recommended to check for new updates regularly.
- Visit the respective application store on your phone.
- Search for Instagram, check if there are any new updates available and install it.
Furthermore, some people might have joined beta stages of the application. Beta versions of an application are unstable. They are like experimental modes of the application. So if you have joined beta, wait for a new update or get out of the beta and download a normal or stable version.
Bugs in the application might be the reason your videos are blurry. So, do stay updated with a stable version of the application.
10. Try uploading using PC instead of App
If still your reels isn’t of good quality, try uploading to from your PC or using the Web browser instead of the Instagram app.
This can help you avoid some of the compression and quality loss issues that can occur when uploading videos from a mobile device.
Simply transfer your edited video file to your computer and use the Instagram website to upload your video to your account.
11. Try using another device
If you’re still experiencing quality issues with your Instagram Reels, you can also try using another device to upload your video.
This can help you identify whether the issue is with your original device or with Instagram itself.
12. Contact Instagram Support
Instagram Help Center website contains various how to guide for various things on Instagram. It also has various FAQs that have been answered by Instagram’s customer support itself.
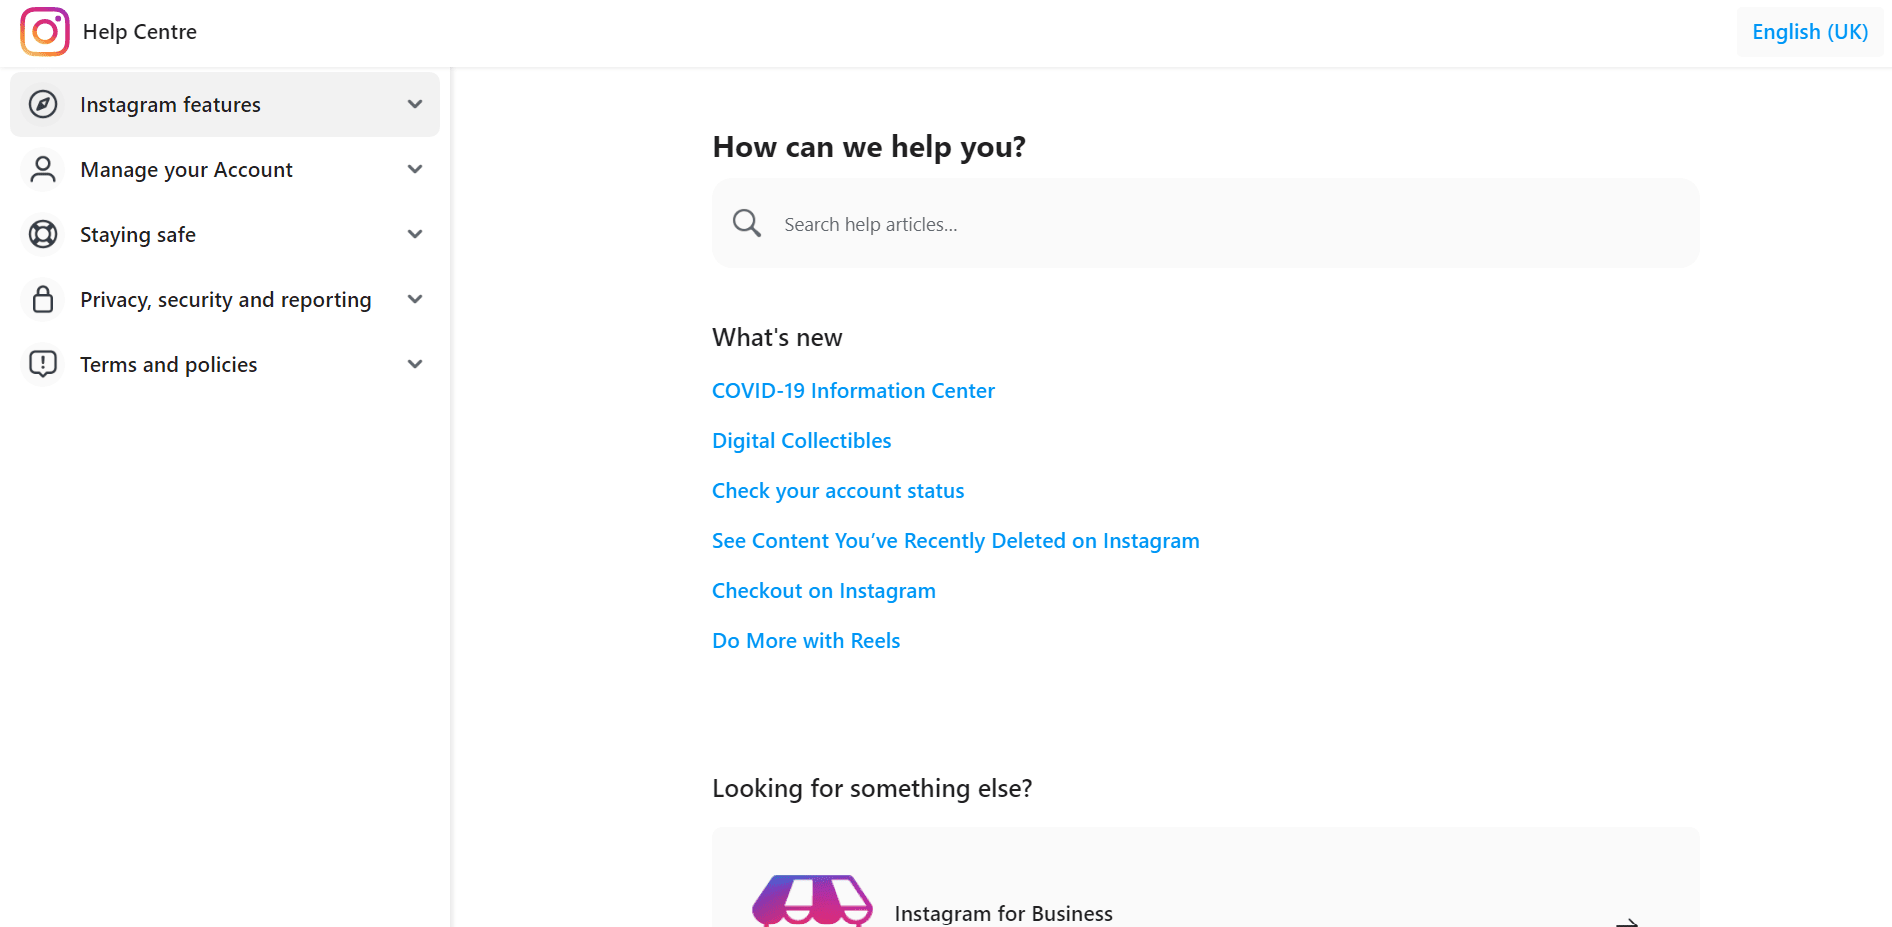
In the search bar titled “Search help articles”, type in your own question or problem regarding the Reels. It will be answered by the Instagram users community or by the customer service representatives itself.
This link – https://help.instagram.com/270447560766967/?helpref=hc_fnav has all the information you require for Instagram Reels. Check out that list of FAQs and guides and see if you can find a question related to your particular issue.
General Tips to fix Instagram blurry reels quality problem
1. Improve Lighting
Make sure you are shooting in a well-lit area. Shooting in low light conditions can cause blurry and grainy footage. Consider shooting in natural light or adding extra lighting to your environment.
2. Clean Camera Lens:
Ensure that your camera lens is clean and free of any smudges or dirt. Dirty lenses can cause blurry footage. Use a microfiber cloth to clean the lens gently.
3. Steady Your Shot
Use a tripod or stabilizer to keep your camera steady. Shaky footage can cause blur and distortion.
4. Make sure your editing software isn’t reducing the quality
When exporting your edited footage, make sure you’re using the correct export settings for Instagram Reels. Instagram Reels currently support videos with a resolution of 1080×1920 pixels and a maximum frame rate of 30 frames per second (fps).
5. Upgrade your Phone or Camera
If your phone’s camera is outdated or of low quality, it might not be able to capture high-quality footage. Consider upgrading to a newer device or using a professional camera.
SEE ALSO:
- (6 Reasons) Why Can’t People Share My Instagram Story [Workarounds]
- 7 Fixes : Instagram Music Stickers Not Showing/ Available
- How To See Instagram Reels History
FAQs
Q1. What are the maximum and minimum sizes of videos that can be uploaded to Instagram?
The maximum and minimum sizes that Instagram accepts in Reels and posts are 60 seconds and 3 seconds respectively. And Instagram Story lets you upload videos of 10 seconds. But, IGTV is the only exception. It allows videos from 15 seconds to 10 minutes.
Q2. In the reels page I am not getting relevant videos. How to make them more relevant?
The Reels page and explore page work on an AI algorithm. It gets you the next video depending on the times you interact with a certain genre of videos. If you like puppies and watch those, you will get puppy videos in the future too. Or if you like car videos, car videos will be more.
So next time you get a video you don’t like, don’t interact with it in any way. Don’t even report that, “I’m not interested” – because this also counts as interacting with it. Just don’t watch it. Only find and watch what interests you. The algorithm will improve itself after that.
Q3. Who can view my Reels on Instagram?
Instagram Reels depend on the type of account you control. If you have a public account, your reels will be shared with the public from all around the world. And if your account is private, they will only visible to your followers.
Final Words
We get to know about Instagram Reels and why they are blurry. And I have listed a few ways to fix this problem. Hope these help you solve your issue. Also, I have mentioned a few ways to upload high quality videos to Instagram. Hope this article helps you. That is all folks.
Thank you! Don’t have a good day, have a great day!

Sri Sahith is passionate and writes his articles by ensuring attention to detail. During his graduation study, he has taken elective subjects like Business Economics and Financial Analysis. These gave him the interest, knowledge and passion to write articles related to Finance-Tech. Also, he loves to read books and talk about them as long as possible.


