Have you been thinking about closing your SeatGeek account?
Want a detailed explanation of how to delete your account?
Well, worry no more! Now that you’ve discovered this post, you can sit back and relax as we walk you through the steps you need to take for deleting your SeatGeek account.
For whatever reason (having discovered a better ticket service, for example), or for no reason at all, we totally understand that you’d want to delete your account. And we’ve got you covered with a short and straightforward tutorial that will show you how to delete your account. To delete your SeatGeek account without any fuss, simply follow the steps outlined in this article.
How to delete SeatGeek account

Web and Android users:
- Step 1: Launch SeatGeek on your device
Open the SeatGeek app on your Android device or go to the SeatGeek website on your computer’s web browser.
- Step 2: Log in to your SeatGeek account using your registered email address and password
- Step 3: Navigate to the Me section or the Orders section
Once you’ve signed into the SeatGeek website, select the “Me” section to access your personal information. Your account information and preferences will usually be found in this menu. The Contact Support option may be found here.
If you’re using Android, go to the Orders section. Click on one of your orders, go to the bottom till you see the option to “Contact Support” and then choose it.
- Step 4: Request the team to delete your account
The SeatGeek team is available to help you terminate your account. It’s possible that the SeatGeek support staff may ask for more verification information before deleting an account for safety concerns.
iOS users:
- Step 1: Launch the SeatGeek app on your iPhone or iPad
- Step 2: Navigate to the “Me” tab, usually located at the bottom of the screen
- Step 3: Now, click on it to access your account settings
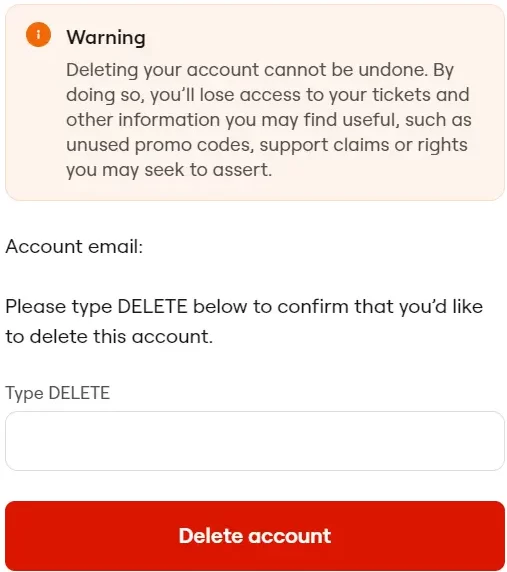
- Step 4: Go to the bottom, find the option labeled “Delete account” and click on it
The terms and conditions of closing your account will be provided to you. You should read them thoroughly to learn what happens when an account is deleted.
- Step 5: Type DELETE in the required field
The account may be deleted by typing “DELETE” into the appropriate field. This is a required confirmation step before the account can be permanently deleted.

- Step 6: Cick on the “Delete account” button to initiate the deletion process.
Taking the step to delete your SeatGeek account is irreversible, so think carefully before doing so. When you remove your account, you’ll also remove your tickets, order history, and any unredeemed discount vouchers.
Your open claims or conflicts with support will be resolved, meaning that you will have no further say in these matters. Ensure that you’ve taken care of everything that needs to be taken care of before terminating your account.
Final Words
Finally, we hope that you’ve found this detailed guide to be useful in closing your SeatGeek account. If you follow the step-by-step instructions in this post, you should have no trouble deleting your account from the web, Android, or iOS.

Having earned a Bachelor’s degree in Commerce from Ravenshaw University, with a background in Accounting and Finance, Akshita Pattanayak contributes to UniTopTen by writing clear and concise articles based on Finance-Tech. With more than a hundred fin-tech related articles, she hopes to educate people about how banking and payment apps function.
